
Sprinkler valves are essential components of a lawn irrigation system. They control the flow of water that runs through the system. A failure in one of them can cause your lawn to suffer due to inadequate or improper watering.
Sprinkler valves can fail over time. They can also malfunction due to poor maintenance or manufacturer’s defects. Familiarity with the components that make up a sprinkler valve allows you to maintain them better and troubleshoot problems when they arise.
This article will look at how sprinkler valves function, their components, and how these play a role in how and when sprinkler valves go bad. It will also address how to resolve some of the most common things that fail in sprinkler valves.
The Basic Function of a Sprinkler Valve
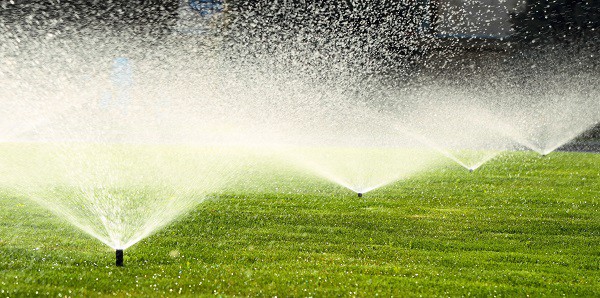
The basic function of sprinkler valves is to control the flow of water from your water source through your lawn’s irrigation system. Each valve controls the water to sprinkler heads located in specific sections of your lawn. This ensures that your entire lawn gets the right amount of water to maintain your grass healthy.
Too much water, and you can have waterlogged sections of the lawn. Not only does this make walking on these sections of lawn uncomfortable, but it can also lead to a deterioration in the health of that patch. Too little water due to a bad sprinkler valve can lead to dry and unsightly brown patches on your lawn.
The Components of a Sprinkler Valve Than Can Go Bad
There are five primary components to a sprinkler valve. When any of these fail or become compromised, your sprinkler system will experience improper water flow or no water flow at all. These are the components, along with the signs that they may be going bad.
Inlet Connection
The inlet pipe connects to the sprinkler valve at its inlet. It brings water to the valve from your main water source so that it can distribute it to the sprinkler heads that it feeds.
If this connection comes loose, you will experience a leak at that junction. This will lead to your sprinkler valve operating with inadequate water pressure. This can result in the amount of water that it routes to the sprinkler heads being insufficient for them to distribute the water in the radius that was intended. It can also lead to the sprinkler heads further from your valve to not function at all.
Signs of a Faulty Inlet Connection
The most common sign of a faulty inlet connection with your sprinkler valve is the accumulation of water in the valve box. This can cause the valve box to flood and possibly overflow.
Another sign of a faulty inlet connection is a noticeable decrease in water pressure emanating from the sprinkler heads the further down the line they are from the affected sprinkler valve.
You might also experience puddling around the sprinkler heads that the valve feeds. This is caused by an insufficient amount of water pressure in your valve, causing it not to seal off properly when shut off. This can release water through the outlet and to your sprinkler heads, ending up in puddles of water at those points when the system was meant to be turned off.
Outlet Connection
The outlet connection distributes the water through the outlet pipe to the sprinkler heads. A faulty connection or leak at this point will result in reduced water pressure being fed to your sprinklers just as with a faulty inlet connection.
Signs of a Faulty Outlet Connection
The same signs described above for a faulty inlet connection apply to a faulty outlet connection. A way to distinguish if the fault is emanating from the outlet or inlet connection is the presence of visible leaks from either end.
If you cannot visually make that determination because the leak is minimal or infrequent, placing a piece of cardboard or a rag underneath each connection will help. The presence of dampness will allow you to identify whether the outlet or inlet is to blame.
Bonnet/Valve Cover
The valve cover is commonly known as the “bonnet.” It is the prominent round cap that is visible on the top of a sprinkler valve. Depending on the model of the valve, this could be flat or slightly rounded.
Some are attached by screws. Others attach directly to the body of the sprinkler valve and can be removed with a pair of adjustable pliers.
The bonnet covers the chamber that holds the diaphragm and diaphragm spring. When it is removed, it also gives you access to the filter that separates the inlet from the bonnet chamber.
If the bonnet cover is not securely tightened or if the seal degrades or is damaged, this section can leak.
Additionally, if the filter is dirty or clogged, this can impede water flow from the inlet to the bonnet chamber. This, in turn, can cause the chamber not to pressurize properly and negatively affect the diaphragm from closing properly and causing water to leak into the outlet and feed water to the sprinklers when it is supposed to be closed.
When all is in working order, the bonnet chamber is filled with water from the inlet, and it creates enough water pressure for the diaphragm to impede any water flow from reaching the outlet.
Signs of a Faulty Bonnet
Signs of visible rust on the screws attaching the bonnet cover to the body of the sprinkler valve can be an indication that there is a leak. Likewise, water or moisture accumulating in the area immediately below the bonnet is another indication.
Your sprinkler heads not shutting off or releasing trickles when the system is powered off is another sign of a potential problem with the bonnet. Insufficient water pressure to the sprinkler heads is yet another sign.
Solenoid
The solenoid of a sprinkler valve is the large tubular unit — usually black or dark in color — located nearest the outlet end of the valve. Its purpose is to control the flow of water from the inlet and the bonnet chamber to the outlet.
Contained within the solenoid is a separate chamber — also known as the plunger well. An electric coil is enclosed in the walls of the chamber. Within the chamber, there is a plunger unit. This is metallic, and a rubber gasket is attached to the downward-facing end. Its purpose is to keep water from the bonnet chamber from flowing to the outlet.
The coil within the solenoid is magnetized when an electric current is run through it. This causes the plunger rod to rise. When it does, it creates an opening for the water in the bonnet chamber to flow into the outlet. This removes the pressure on the diaphragm and allows water to flow freely from the inlet to the outlet — pressurizing the feeder line to your sprinkler heads.
Signs of a Faulty Solenoid
The sprinkler heads not engaging when you turn the system on can be a sign of the plunger rod in the solenoid not rising to allow water from the bonnet chamber to flow to the outlet. This can be caused by a failure in the wiring, insufficient current reaching the solenoid, or debris in the plunger well.
The sprinkler heads not shutting off can be caused by the solenoid’s plunger not dropping back down or the gasket at its tip not sealing properly.
Diaphragm
The diaphragm of a sprinkler valve is the large rubber seal at the bottom of the bonnet chamber. When water is fed properly into it from the inlet valve, the water pressure within the bonnet chamber bears down on the seal stopping the flow of water into the outlet.
Signs of a Faulty Diaphragm
A diaphragm that does not create an adequate seal will allow water into the outlet sending water to your sprinkler heads. This will lead to sprinkler heads that don’t shut off immediately when turned off. It can also cause dribbling sprinkler heads.
Troubleshooting a Sprinkler Valve That Is Going Bad
If your sprinkler valve is experiencing any of the issues described above, there are a few steps that you must take before you start any troubleshooting and repairs:
- Shut off the supply of water to the affected sprinkler valve. You can accomplish this by shutting off the entire water supply to your house from the main shut-off valve. Alternatively, if your sprinkler valves are equipped with their independent shut-off valve or a manifold shut-off valve, use that.
- Shut off the power to your sprinkler valve. The solenoid on a sprinkler valve requires current to operate. Before opening any part of your sprinkler valve — especially the solenoid — you need to shut off the power that feeds it.
- Have the required tools ready. These will usually consist of a screwdriver, adjustable wrench, and pliers. Opening your sprinkler valve to access its interior components is not complicated. Use the information in the preceding section to identify the interior components.
- If your repair involves replacing PVC pipe, have replacement pieces in the correct diameter along with PVC cement ready.
Troubleshooting a Sprinkler Valve’s Inlet or Outlet
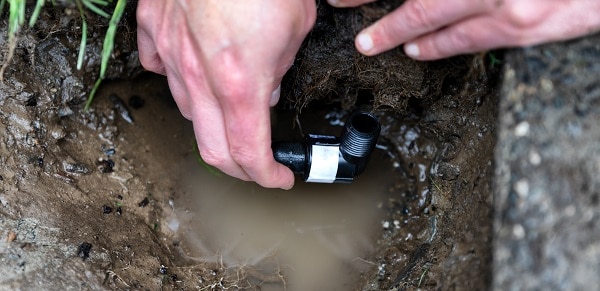
If you have detected that there is a leak from either the inlet or outlet of a sprinkler valve, you need to determine the precise origin of the leak.
If the leak is coming from the joint of the inlet or outlet pipe to the sprinkler valve, it could be caused by a union that has deteriorated. This can be rectified by removing the pipe from the inlet or outlet connection; then, thoroughly clean the ends of the pipe and inlet or outlet. Apply PVC cement and hold the pieces together for 30 seconds.
Allow the cement to cure. Final curing times will vary. Follow the manufacturer’s instructions on the PVC cement that you are using. In general, a 15 minute curing time is enough to repressurize the system with water for testing. Two hours is usually the full curing time for PVC cement.
If the leak is coming, not from the joints, but the pipe, check it for cracks. If any are present, that section of the pipe needs to be replaced.
It should also be noted that the leaky connection could come from the short section of the pipe that connects the valve manifold to the sprinkler valve. It could also come from the main feeder pipe that feeds the entire manifold. Repairing these connections follow the same steps described above for the inlet and outlet connections.
Discarded Issues That Can Be Misdiagnosed as Inlet/Outlet Problems
It is not uncommon for problems in other parts of your irrigation system to be misdiagnosed as issues with the inlet or outlet. These can include:
Insufficient Water Pressure From Your Main Water Supply
Since a sprinkler valve requires proper water pressure to function effectively, if your main water feeder pipe is not delivering enough pressure through the manifold and to the sprinkler valve, this can cause similar warning signs to leaks within the valve’s components or a defective diaphragm or solenoid.
To test for this, you need to disconnect the main feeder pipe from the manifold. You then turn the water back on and gauge if the water is coming out at normal pressure. If the pressure is noticeably reduced, check to see if there are any obstructions caught in the main feeder pipe, the manifold, manifold pipes, and the inlet feeder pipe.
If you live in an area that suffers from hard water, this can cause the accumulation of calcified deposits in these pipes and where they connect. If you found and removed any obstructions, allow the main feeder line to run with water for one or two minutes to properly rinse out residual debris before connecting everything back to the sprinkler valve.
Troubleshooting the Sprinkler Valve Bonnet
If you have discarded the presence of any leaks at the inlet and outlet — as well as water pressure related issues from the main feeder line — then the problem with a bad sprinkler valve likely resides within the bonnet chamber or the solenoid.
To troubleshoot the bonnet, you must remove the bonnet cap. If it’s held by screws, simply unscrew them and remove the cap. If there are no screws present, it is removed by unscrewing it directly from the valve body. This will usually require the use of an adjustable wrench.
Once the cap is removed, check the integrity of any seals that are present where the bonnet cap tightens on the valve body. Also, check for any cracks in the valve body and bonnet chamber.
Faulty or missing seal gaskets can be replaced. Cracks in the bonnet chamber or valve body will usually require replacing the entire sprinkler valve casing.
Check the Filter While the Bonnet Chamber Is Open
With the bonnet chamber open, you will also have access to the valve’s water filter. This will be located on the inlet side of the chamber. Most valve filters can be removed by hand. Once removed, check to see if any physical debris is clogging it. If so, clean the filter with running water.
Water pressure related issues can sometimes be resolved simply by cleaning the filter or replacing it if it is damaged. If you did find the filter to be dirty or damaged, make sure to remove any debris that may have worked itself into the bonnet chamber before sealing it again.
Troubleshooting the Diaphragm
Once you have removed the bonnet cap, you will find the diaphragm spring occupying the majority of the space. At the bottom of the chamber, you will find the actual rubber diaphragm.
These can be pulled out of the chamber without the need for special tools. Inspect the spring. If it appears bent or broken, it will need to be replaced.
The rubber diaphragm seal performs the important role of stopping the flow of water from the inlet to the outlet. If it is cracked or if it is malformed and no longer makes a tight seal at the bottom of the chamber, it needs to be replaced.
Also, check for debris such as particles of sand or dirt. These can prevent the diaphragm from creating an adequate seal at the bottom of the chamber.
Troubleshooting the Solenoid
Before troubleshooting the solenoid, it is important to reiterate that the power to the sprinkler valve must be shut off.
Once you have done so, you can proceed to disconnect the two wires that feed power to it. You can then remove the entire solenoid by unscrewing it. For most models, this is done by hand using a counterclockwise motion.
With the solenoid removed, you can pull out the metallic plunger. Check the rubber gasket at its foot. If it shows signs of damage, replace it. Depending on the model, the plunger and footer gasket may be replaced separately, while others come as a single unit.
With the solenoid removed and the plunger extracted, you will have a clear view of the plunger well. If there is any debris, clean it out.
If you have eliminated any issues with the plunger and footer gasket and if there wasn’t any debris in the well, you can check for problems with the current that runs the solenoid. To do this, you need to use a voltmeter.
Touch each of the probes of the voltmeter to each of the solenoid’s wire connectors. The proper range for the current that it detects will depend on the model of your sprinkler valve and solenoid. Check the manufacturer’s instructions for exact ranges. However, 20 to 60 ohms would be considered the norm for most solenoids.
If the current detected is outside of the acceptable range — or if no current is detected at all — the solenoid will need to be replaced. If you want to discard potential problems with the wiring at a point before it reaches the solenoid, you can connect a second solenoid to the same wires and conduct the voltmeter test again. If no current issues are detected on the second test, it would confirm the diagnosis of a faulty solenoid.
Conclusion
Sprinkler valves — just like any other component in your lawn irrigation system — can go bad even when properly maintained. By knowing the role of the sprinkler valve and how its different parts work together, you will be better prepared to identify the nature of problems when they arise. It will also help you to keep your sprinkler valves well maintained to prolong their use.