
Whether you’re digging a pond for aesthetic appeal or to create a thriving fish habitat, the soil often dictates what you can do. Sandy soil is known to be one of the toughest materials to deal with for a plethora of reasons. It’s loose, moves around too often, and its building ledges can be an issue.
You can dig a pond in sandy soil if you start by assessing the landscape to see if there’s dirt below the sand, build ledges with gravel, and install a rubber lining to retain the water. Consider using a premade hardened pond template, adding fish and plants, and treating the water accordingly.
Throughout this article, you’ll also learn the following info about digging a pond in sandy soil:
- The detailed step-by-step process to get the job done back
- Comparisons between hiring an expert and doing it yourself
- How to treat and maintain a pond with sandy soil
Assess the Site Before You Get Started
A site assessment is key if you want to know what you’re getting yourself into. Bumpy sand that’s filled with rocks can be a bit harder to work with than traditional sandy soil. You should also keep an eye out for how big you want the pond to be in case there are any roots or plants running through the area.
Pond Trade Mag mentions that a site assessment should entail how deep the pond will be, what’s surrounding the pond (walkways, waterways, etc.), and whether or not any other features could be installed in the area. If you want a walkway that’s slightly elevated from the pond, now is the time to map it out.
Note: Slopes and elevated pathways are just a small part of the assessment process. You should also consider blueprints, hiring other people, boulders, gravel, and many other parts of the pond. I’ll cover everything you need to know about site assessments and how to get started on them throughout this article.
Compare DIY vs. Hiring a Professional
Digging and filling a pond yourself might seem like the cheaper alternative, but there’s no denying the benefits of hiring experts to do it for you. In this section, we’ll cover the pros and cons of both sides of the argument.
Pros of DIY Ponds in Sandy Soil
- You’ll save hundreds to thousands of dollars. The labor, service, and trip charges that come with hiring experts tend to add up quite a bit. By doing everything yourself (or with friends and family), you won’t have to deal with all of those extra unwanted expenses.
- You can get the job done on a specific timeframe. Rather than having to wait weeks or months for them to come out and give you a quote, you can start working on the pond immediately. You’ll be able to have a pond in a few hours or days rather than half of a year or more.
- It’ll teach you everything about your pond. When you know what goes into the pond’s installation process, you’ll know what to do if something goes wrong. Small leaks, chemical inconsistencies, or slopes can all be corrected.
Pros of Hiring Experts for Ponds in Sandy Soil
- Experts are responsible if anything goes wrong with the pond. If you’re not used to construction, then you might miss a mistake or two. These small errors will have a ripple effect that can destroy the pond later on down the road. Fortunately, experts can keep an eye out for these issues.
- You might be able to secure a warranty deal with the company. Many businesses will offer multi-year warranties to keep your pond protected. You can have leaks covered, regular maintenance performed, and so on.
- You’ll have the peace of mind that everything will be done right the first time. No more worrying about whether or not you did the job correctly. The worst thing about DIY ponds is that you have to wait for several weeks to know if you made a mistake, but that’s not the case with professional installations.
Look for Areas With Clay or Dirt
Clay and dirt are two of the best types of soil to work with when you’re digging a pond. Even if the surface material is made out of the sand, you might be able to find clay and dirt a few feet below the surface. It’s a good idea to know what’s below so you can see what you have to work with.
If you only find sand for many feet, then you’re not out of luck. There are countless techniques that you can use to prevent the sandy soil from caving in. Perhaps the biggest known issue of digging a pond in sandy soil is that it always falls into itself. By using rocks and other materials, you can prevent this from happening.
On the other hand, those who find clay or dirt will have to decide what tools they need to rent for the job. If you’re digging it by hand, then you’ll have a challenging time removing clay. Dirt isn’t much of a nuisance, though. For more information about the tools and machines that you’ll need, read on.
Rent or Buy an Excavator
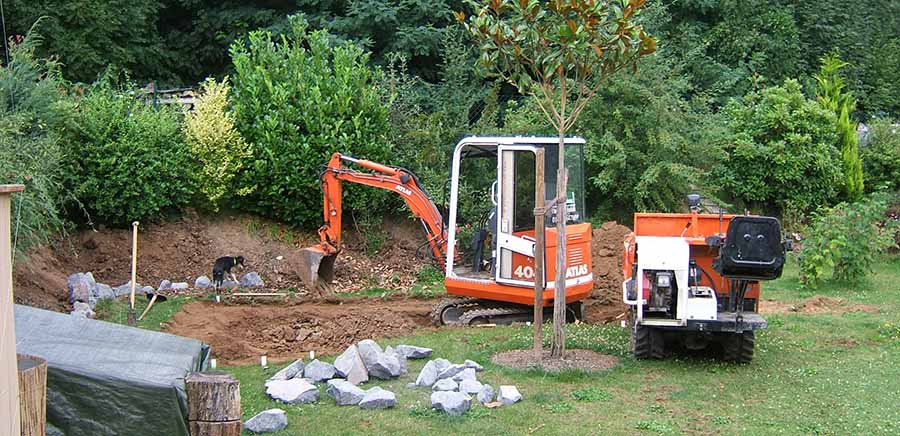
Excavators are very useful for building ponds for a plethora of reasons. For startings, they come with a scooping tool that can remove clay, sand, dirt, gravel, and more. If you’re tired of repeatedly removing sand from the pit, then an excavator will be your best bet. Note that you can still make a pond without an excavator.
Even if you happen to get one of these machines, you should get shovels to pick up small bits of sand here and there. Excavators are excellent for big projects, but they might feel tedious for smaller ones. Also, get a shovel, jackhammer (if needed), and hoses to dampen the sand.
Make sure that you work backward when operating the excavator. For small ponds, you won’t have to move it around very much. Larger projects will require that you go backward since it prevents you from falling into the pond as you dig it.
Create Ledges With Boulders and Gravel
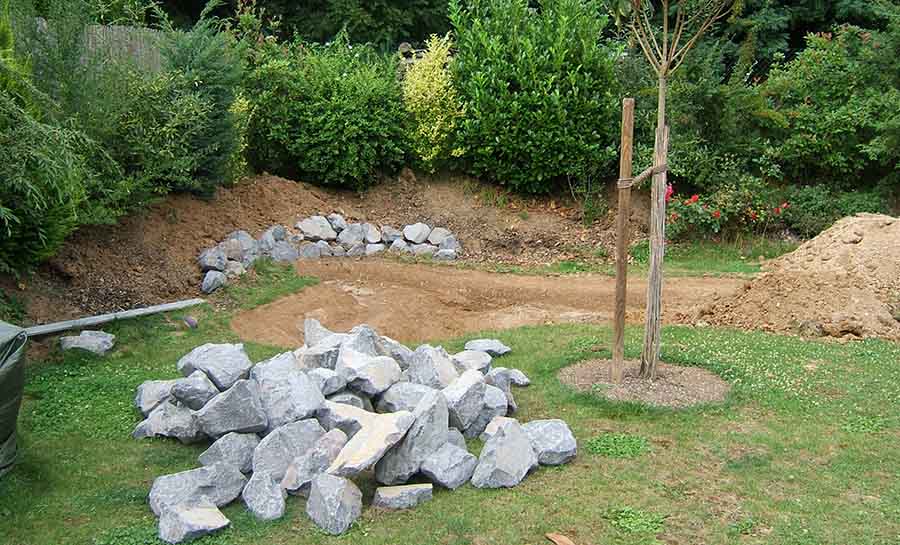
As stated by the Pond Boss community, using boulders, rocks, and gravel can make a huge difference when you’re dealing with sandy soil. Once you’ve dug the hole and you have the proper shape and size laid out, it’s time to push boulders or gravel into the sidewalls.
Follow these steps to create ledges for your pond for a better structure:
- Slope the pond inward rather than trying to make perfect 90-degree walls.
- Dampen the soil with a garden hose to compact the sand.
- Cover the flat bottom of the pond with gravel. A thin two to three-inch layer should do fine.
- Place boulders or medium-sized rocks around the edge of the gravel bottom, ensuring that you press them in enough to indent into the walls.
That’s all there is to it! Making ledges will drastically improve the structural integrity of a sandy soil pond. Many pond owners claim that this process is essential for a long-lasting body of water.
Consider Using a Rubber Liner
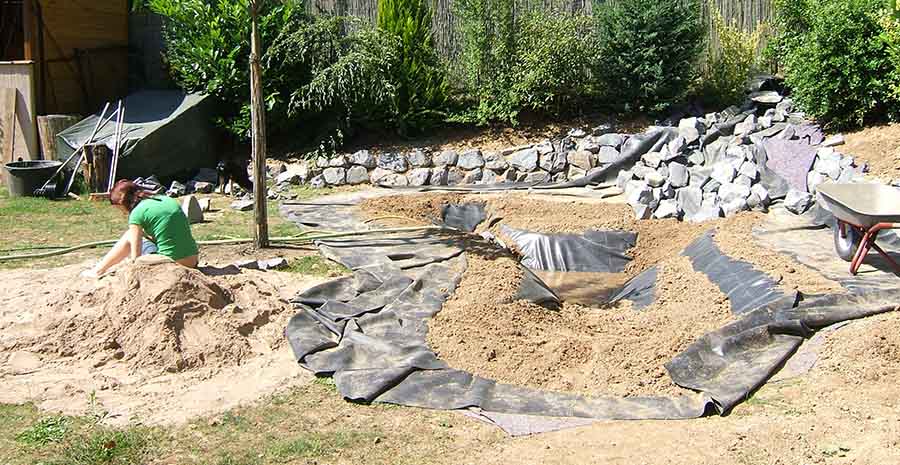
Rubber liners are an excellent choice if you want to retain the water. However, they’re not necessary for those who prefer a natural pond. The benefits of using a rubber liner for a sandy soil pond are as follows:
- It retains water without letting it fall through the sand.
- Rubber liners prevent too much evaporation since they don’t get scorchingly hot like sand tends to.
- They’re fairly cheap, and they don’t break or wear down over time.
That being said, people who don’t want a rubber bottom will still be able to enjoy the natural appearance of a sandy pond. Since sand is fine and dense, it sinks, allowing the water to stay clearer than other types of soil.
Remember that if you choose not to use rubber liners, it’s still recommended that you use gravel and boulders to structure the pond. You need to use these materials with or without the liner, but you can choose rocks that naturally occur in the environment if you’d like.
Add Plumbing Pipes for Pumps, Filters, and Heaters
Before you fill the pond, it’s time to install the plumbing (if you’re adding equipment). Pumps, filters, heaters, salt systems, and other equipment can be used with a pond to keep it clean and regulated throughout the year. Rather than relying solely on chemical treatments, you can use these products for a longer-lasting pond.
Keep in mind that running plumbing uphill will require more energy from the equipment, which will cause wear and tear. On that note, the pipes should be accessible if you need to fix a leak or make a directional correction. The good news is that sand is fairly easy to remove to find and fix plumbing.
Finally, when you’re plumbing a pond in sandy soil, try to avoid too many turns and sharp angles. Every turn causes a little bit more strain on the pipes, which causes the equipment to work harder. You’ll reduce electrical bills and wear if you keep it simple, straight forward, and evenly leveled.
Install a Premade Pond Template (Optional)
Pond templates are few and far between these days, but they’re more than worth it if you’re trying to cut corners and save time. You don’t need to be an expert to install a template. Many customers believe that they’re perfect for sandy soil since they remove the need for rocks, boulders, and rubber liners.
Pond templates range from a couple of hundred dollars to several thousands of dollars, depending on the shape, size, company, material, and construction quality. Keep in mind that they’re only designed for small ponds, so you won’t be able to find a pond template for a massive 50-foot pond.
Map Out Areas for Plants and Fish
Once you’ve chosen between liners, natural sandy bottoms, or premade pond templates, it’s time to consider what’s going inside. Do you want a specific amount of fish? Is it going to be a freshwater or saltwater pond? These questions all need to be answered before you start filling and completing the installation.
Remember that different types of fish have environmental requirements that might not overlap with others. For example, some fish need more room than others, whereas bottom feeders need algae and other food sources to thrive. Talk to a local expert on plant life and fish before making any decisions.
It’s also a good idea to make simple blueprints to know where plants and rocks will be positioned. While the fish will be able to roam freely, now is the time for aesthetic enhancements. You can choose between a natural look or one with boat wrecks and other additions.
Think About Waterfalls and Spillways
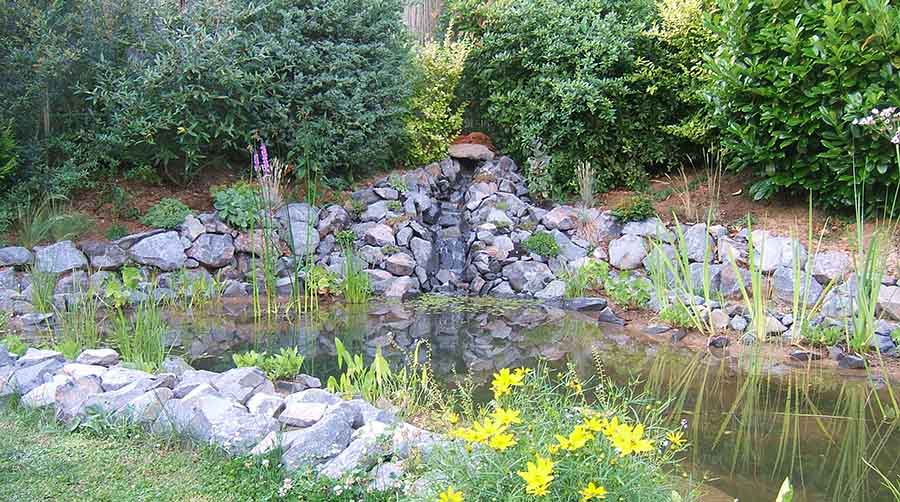
According to the Garden Pond Forum, spillways and waterfalls are easy to make during the installation process, especially when you have slopes to work with. Whether the plumbing is sloped up, down, or level, you’ll be able to make a variety of water features during this stage of the installation.
Spillways are useful if you live in an area that floods, whereas waterfalls can be a focal point of any pond. Remember that if you have fish and you want a waterfall, it needs to be shallow enough that it doesn’t hurt them. Also, there should be a closed-off waterway to prevent the waterfall from pulling the fish through.
Spillways and waterfalls aren’t a requirement for outdoor and indoor ponds, but they make a big visual impact. You could add UV lights to fight algae and prevent the spread of bacteria as well. These minor additions can make a world of difference when you’re trying to increase the value and appearance of a sandy soil pond.
If you’re ever in the situation, that your pond is already covered with algae and probably even gets a bit smelly, check out the article I wrote on how to get rid of a stinky pond.
Note: If you intend to build any of these features, you should strongly consider hiring a pro as mentioned earlier. They’re a bit trickier to install, especially lights, since they have long cables and a watertight seal. The electrical work needs to be sealed as well to prevent shocks and shortages.
Add and Treat the Water
Now that you have everything loaded into your sandy soil pond, it’s time to add water and treat it. The process of adding water can take several hours, depending on how many gallons the pond is. Many ponds stand between 250 to 2,000 gallons, but the sky’s the limit for the gallon total.
As the water level rises, the sand will undoubtedly get displaced. Don’t worry about it; This process is natural, and the sand will settle an hour or so after you turn off the hose. Analyze the plant life as the water goes up (if you’ve chosen to place plants in the pond before filling it with water).
When it comes to adding chemicals, it’s essential that the water levels are balanced before adding fish to the pond. The pH, chlorine, alkalinity, and other chemical readings can dictate what type of plants and fish can call the pond home. Consider using the Capetsma 9-in-1 Test Strips (link to Amazon) to keep an eye on the levels.
For more details about how to treat your pond and keep it clear, check out these video tips from the Barefooted Gardener:
Perform Monthly Checkups
Once you have everything finished, you’re not quite done yet. You need to check the pond every few weeks or months to ensure that it’s not caving inward or leaking. New ponds typically have a couple of months of settling due to the heavyweight nature of water, plants, and fish. You’ll also have to check the chemical levels with a test kit, as mentioned earlier.
If you’re trying to save time and energy, there are plenty of maintenance services on the market. Hiring a weekly or bi-weekly service can help your pond stay in top-notch condition. Even a monthly service is a good idea since you’ll be able to maintain it during the weekdays and benefit from the clearing service at the start of each month.
If you ever notice bubbles, discoloration, cloudiness, rapid water loss, or excessive amounts of sediment, then you should call a pond care technician as soon as possible. These signs could be an indication of a leak or chemical imbalance.
Conclusion
Building a pond in sandy soil doesn’t have to be such a hassle. As long as you follow the helpful tips found on this page, you’ll be able to dig, fill, and create the ultimate water habitat for your favorite plants and fish.
Here’s a quick recap of the post:
- Make sure that the sides of the sandy soil are sloped inward rather than vertical.
- Consider using rubber liners or premade hardened pond templates to retain water.
- Get your hands on tools, including shovels, jackhammers (optional), and an excavator.
- Weigh your options between hiring professionals to dig and fill the pond or DIY the whole project.