
Getting a flat on your lawnmower tire can be such a pain. And repairing the tire can be even more of a pain! There are plenty of options to find out how to fix a tire online, but the sheer amount of options from YouTube to forum sites may cause a headache.
To help ease your brain from ensuing headaches, I have compiled a list of three ways to repair a tire and the types of equipment you will need to repair your tire. This will put you on the right track.
For every tire, including lawnmower tires, there is a point of no return when a tire cannot be repaired. It is essential to know the difference between what can be fixed and what cannot be fixed. That’s why this article has a section dedicated to what tire damages and mishaps cannot usually be fixed using these three repairing strategies.
Using Tire Sealant to Repair Your Tire
If there’s a small hole caused by an impaled object on your tire, one of the best ways to repair it is by using tire sealant.
Types of Tire Sealant
Using sealant to repair a lawn mower tire is ideally a straightforward process. But there are a few different types of sealant to choose from, so knowing the right one to choose is vital.
Pressurized Tire Sealant
Pressurized sealants cost around the $6-12 range, so you won’t have an empty wallet trying to look for one. Pressurized sealants are cheap and only made for one-time use.
Liquid Tire Sealant
Liquid sealants, which pour into the valve stem of a tire wheel, cost a little bit more, around $9-12. You will need a compressor or portable tire inflator for the liquid sealant to work correctly.
Tire Sealant Kit
Tire sealant kits come with a compressor, and they can cost in the $30-80 range. I would recommend getting a sealant kit over the other options. The kit provides the compressor that liquid sealants need and inflates the tire unlike what most pressurized sealants claim they do.
If you need recommendations on what type of tire sealant is the best, check out Consumer Reports’ tire sealant review page. Consumer Reports gives excellent micro-reviews on which sealants are capable of filling 2.4 mm and 5.8 mm tire holes. They also list the price of each sealant, so you don’t have to look it up.
How to Use Sealant to Repair Your Lawn Mower Tire
Before you do any work, DO NOT pull out the object that is causing the hole in the tire at first. This will cause the sealant to be unable to seal the hole. You can pull the object out of the tire after applying sealant, as shown in the directions later.
Some sealant bottles may come with a chart to tell you how much sealant you should use for the size of the tire you’re fixing. Make sure you look at the chart to see how much sealant you should use or else your tire will not have enough sealant, and the leakage will happen again.
Tools Needed:
- Sealant (Pressurized, Liquid, or a Sealant Kit) – A good tire repair kit is the one from TireJect that can be found on Amazon.
- Along with a Compressor or Tire Inflator
- Valve Stem Tool
- Soapy Water
Directions
- If you cannot find where the leak is, pour a soapy water solution on the tire. The air from the leak will make bubbles from the soapy water, showing you where the leak is.
- Rotate your tire, so the valve stem is at the 5 o’clock position. This position is the most easily accessible position to work on your tire.
- Remove the valve stem core from the tire using the valve stem tool.
- Shake the sealant bottle before opening it. Open the sealant bottle and connect the hose that comes with the sealant to the bottle tip.
- Connect the other end of the hose to the tire’s valve stem.
- Squeeze the bottle of sealant and inject the right amount of sealant into the tire
- Disconnect the hose from the valve stem and wipe out any sealant residue
- Put back on the valve stem core and fill the tire with the recommended pressure. Remember, if you are using the liquid sealant, you will need a compressor or tire inflator.
- Reinstall the valve stem cap and pull out whatever was stuck in the tire in the first place if there was is something stuck in the tire.
- It’s recommended to drive the lawnmower around for about 5 minutes to distribute the sealant evenly around the tire.
- After the drive, pour some soapy water solution on the tire one last time to make sure the sealant has sealed the hole.
This video here from TireJect explains the process step by step.
Plugging a Tire by Using a Tire Plug Kit
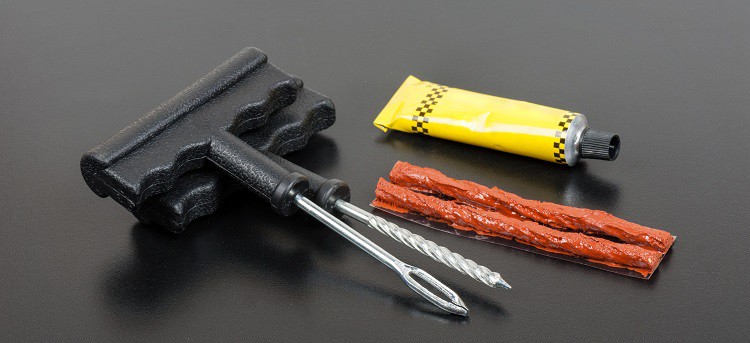
A tire plug kit is another way to fix a hole in your tire. Usually, tire plug kits come with a reamer/plug tool, some plug wires which block the hole, and some contact cement.
To plug a tire, the tire needs to be removed from the car, so a floor jack is necessary. Here are some of the tools you will need to patch up the tire.
Tools:
- Tire Plug Kit – A good tire repair kit is the one from Bould Tools that can be found on Amazon. It conveniently also includes a Valve Stem Tool and everything you need to have to plug your tire. So you’re pretty much good to go.
- Soapy Water
- Valve Stem Tool
- Razor Blade
- Pliers
- Floor Jack
- Jack Stand
- Wood Planks
- Tire Inflator or Compressor
If you don’t have a tire repair kit, make sure to have these individual items on hand:
- Plug
- Plug Tool
- Reamer
- Contact Cement
Removing a Tire from a Lawn Mower
To plug the tire, you’ll first need to take it off the lawn mower. Follow the directions below to ensure you properly remove the tire, which will also help make sure it goes back on properly.
Directions:
- If you are working with a front tire, use wood planks to block the rear tires from rolling. If you are working with a rear tire, use wood planks on the front tires.
- Place the jack underneath the frame of the mower and jack up the riding mower to raise the front wheel.
- Place a jack stand under the frame to support the riding mower and remove the jack.
- Pull off the tire’s axel cover, remove the retaining ring, and pull off the washer.
- Now you can remove the tire from the mower.
- Pull off the back washer from the axel.
Plugging the Tire
Now that the tire has been removed from the mower, it is time to patch the tire using a tire plug kit.
Directions:
- If you cannot find where the leak is, pour a soapy water solution on the tire. The air from the leak will make bubbles from the soapy water, showing you where the leak is.
- When you find where the leak is, use some pliers to remove whatever has caused the leak if it is still there.
- Remove the valve stem cap and core from the tire. This allows the tire to deflate and accept the patch.
- Use one of the tools from the tire plug kit, the reamer, to open up the hole a bit more by pushing the reamer inside of the hole, twisting it, and pulling it out. This may take a few tries to get the hole to a size large enough for the plug to fit in, so do not stop at just one push inside the hole.
- Use the contact cement to lubricate the hole by pouring the cement over the hole. This will make it easier for the plug to fit in the hole.
Helpful hint… I have seen videos on YouTube where people have poured the contact cement on the plug after inserting the plug in the plug tool. This also works.
- Insert one of the plugs into the plug tool and push the plug into the hole. This requires a bit of strength, so firm pressure is necessary. Like what you have done with the reamer in step 3, make sure you use a lot of force to push the plug into the hole.
- Pull the plug tool out of the hole, and the plug should naturally stay inside of the hole.
- Use a razor blade to carefully trim the plug as it might stick out of the tire a little bit after pulling the tool out.
- Reinstall the valve stem core
- Use your tire compressor/inflator to inflate the tire with the correct amount of air pressure.
This video here expains the process quite well:
Reinstalling the Tire
- After you are done patching up the puncture on your tire, reinstall the tire on the mower by following these simple instructions.
- Reinstall the valve stem cap.
- Insert the back washer on the axle.
- Insert the wheel back on the axle.
- Snap the retaining ring back onto the tire using your pliers.
- Reinstall the washers.
- Reinstall the axle cover back on the wheel.
- Push the jack under the frame, raise the riding mower, and pull out the jack stand.
- Lower the riding mower from the ground and remove those wooden planks from the front or rear tires.
Patching a Tire
Patching a tire is considered the most efficient way to truly repair your damaged tire and can usually fix larger holes than plugs and sealant. The reason why patching a tire is considered the most efficient is because patching doesn’t just check the outside of the tire, but the inside as well.
Can You Patch the Sidewall of a Lawn Mower Tire?
When a tire has a hole in it and begins to lose air, the sidewall starts to deteriorate, leaving black dust from the sidewall on the inside of the tire. This can be prevented by patching a tire.
If you plan on patching a tire, prepare yourself. Patching a tire is easily the most challenging tire job out of the three ways to repair your tire in this article. You know the saying: hard work produces the best results.
But, the sidewall itself can’t be patched. Any damage to the sidewall itself, whether it’s from an outside source of weakening from within, will require a new tire.
Much like using the tire plug kit, patching a tire requires a floor jack to remove the tire from the lawnmower. Patch kits take things one step further, though. Removing the rim of the tire is a crucial step. You will find out how to do so here!
Tools Needed:
- Tire Patch
- Floor Jack
- Soapy Water
- Tire Crayon
- Bead Breaker Bar
- Heavy Hammer: Optional depending on the Bead Breaker Bar you have. Usually, the costlier bead breakers do not require the hammer as they have a built-in tool that breaks the bead.
- 2 Pry Bars
- Tire Patch
- Patch Roller
- Rasp or Diamond-grit sandpaper
- Reamer
- Contact Cement
- Razor Knife
- Compressor
To save you some more time, we’ll start these directions after removing the tire from the lawnmower. Look back at the directions for “Removing a Tire from a Lawnmower” to learn how to do that properly.
- If you cannot find where the leak is, pour a soapy water solution on the tire. The air from the leak will make bubbles from the soapy water, showing you where the leak is.
- Using your Tire Crayon, mark where the tire puncture is. Also, mark the location of the valve stem on the sidewall as well. It will come in handy when you reinstall your tire.
- Remove the valve stem cap and the valve stem core using your valve stem core tool. Let the air leak out of the tire until its flat.
Using a Bead Breaker Tool
Directions:
- Lay your tire flat on the ground and place the beaker bar under the lip of the rim on top of the tire. Put your foot on the rim of the tire to hold it still.
- Pound on the bead breaker with your heavy hammer.
Helpful hint: Not all bead breakers are the same. Some may require a hammer to break the bead while some do not.
- Continue step 2 around the rim, not just at one spot, or else the bead will not fully break.
- Flip the tire around repeat steps 2 and 3.
- Place one of your pry bars under the lip of the tire against the rim and pry it upward.
- Use your other pry bar to pry around the rest of the bead until it is sufficiently above the rim. The second lip of the tire should come off quickly.
Patching the Tire
Directions:
- Locate the hole on the inside of the tire opposite of the crayon mark you made on the thread.
- Use the reamer to open up the hole from the inside of the tire, pushing the reamer inside of the hole, twisting it, and pulling it out. This may take a few tries to get the hole to a size large enough for the plug to fit in, so do not stop at just one push inside the hole.
- To rough up the inside of the tire, use a rasp or diamond-grit sandpaper to rough up a spot more significant than the patch area. Brush away any of the loose rubber.
- Add a layer of rubber cement and brush the cement over an area barely more significant than the patch
- Pull the protective backing off the patch and push the plug part of the patch into the puncture hole from the inside of the tire.
- Insert the wire at the end of the plug and push it as far as you can.
- The plug needs to go deep enough that the patch rests wholly on the inner tire liner.
- The hole might be very tight to push the plug all the way through, so a pair of pliers might be necessary. Use the pliers to pull on the wire part of the plug.
- Seat the patch with a patch roller.
- Use your razor knife to cut the protruding tire plug thread.
Reinstalling the Tire Back on the Rim
- Find your valve stem marking and line it up with the right side and position on the rim.
- Install the tire on the rim.
- If necessary, use the bar to pry the rubber back under the rim.
- Install the valve stem core.
- Inflate the tire by using a compressor or tire inflator. Make sure you use the correct amount of air for your tire.
- Pour the soapy solution all over the tire to check for any more leaks or if the patch is incorrectly installed in the tire.
- Look back at my “Reinstalling the Tire” directions to reinstall the tire back on your lawn mower completely.
When to Get Your Tire Replaced
Lawn mower tires tend to last five years. Sealants, Plugs, and Patches are all perfectly fine ways to repair and expand your tire’s life expectancy (though I believe patching to be the most efficient).
But, there are points where tires have reached the point of no return. Car owners need to know when that point has been reached. Look below for more details!
Some Things Aren’t a DIY Repair Job
- Tires with holes that are larger than 1/4th of an inch.
- If the puncture is in the sidewall of the tire
- No, patches will not fix the sidewall of the tire.
- If your tire has two holes in it that are less than 16 inches apart from each other.
- If your tire is showing signs of dry rot
- Loss of traction caused by dead tread
To check for dead tread, insert a penny into the groove with Lincoln’s head right side up. If you can see all of Lincoln’s head, you should probably replace your tire.
The Verdict
You can fix a flat lawn mower tire on your own, as long as it’s not too far gone. Using sealant, plugging, or patching a lawn mower tire are each effective in their own right. It’s essential to fix the flat tire before any permanent damage is done.
The sidewall can become damaged if there’s a leak in the tire, and that is not a DIY fix. Keep an eye on your lawn mower tires and be ready to replace them about every five years.