
When it comes to leveling a pond on a slope, you’ll need to know a few basic tips about building a pond as well as edging it so that you can enjoy your pond for many years. Creating a pond in a backyard can be a rewarding and enjoyable experience. Having a pond in your yard can provide you with some extra relaxation and can also make you the envy of your neighbors.
If you are leveling a pre-formed pond, then you’ll need to reposition sand. If you are working with a linear pool, you’ll need to use a stake in the center of the pond. If you are doing more complex edging, then you may need to place footings down around your pond.
Since there isn’t much information available online covering how to level a pond on a slope, I’ve created this article to help you out. Below we’ll cover how to level a pond and edging, as well as how to build a pond in your backyard. We’ll also cover some of the best places you can put ponds in your backyard.
Does a Pond Need to be Level?
Yes, a pond does need to be level, or else you risk easily losing water as it runs off from the pond. Luckily, it’s not too difficult to build a level pond on a slope as long as you do some edging. We’ll cover how you can do that below.
Working with Pre-Formed Ponds on a Slope
If you’re working with a pre-formed pond on a slope, you’ll need to follow the steps below.
- To begin, you need to dig out your pond (about 3 inches more than the height of the pre-formed pond shell).
- After digging, fill the hole up to about two to two and a half inches of sand all around.
- After you’ve filled the sand, level it out so that it is even. You may need to put more sand on the lower part of the slope than the higher part to level it out.
- Put a level along the top part of the pond to make sure it’s even. If you don’t have a level, you can use a straight board.
- You may need to fill some more sand to level it out.
- You may need to repeat the steps a few times to level out your slope.
- Once you’ve leveld it out, backfill the side walls and then fill the pond back up to your desired spot.
Working with Liner Pools on a Slope
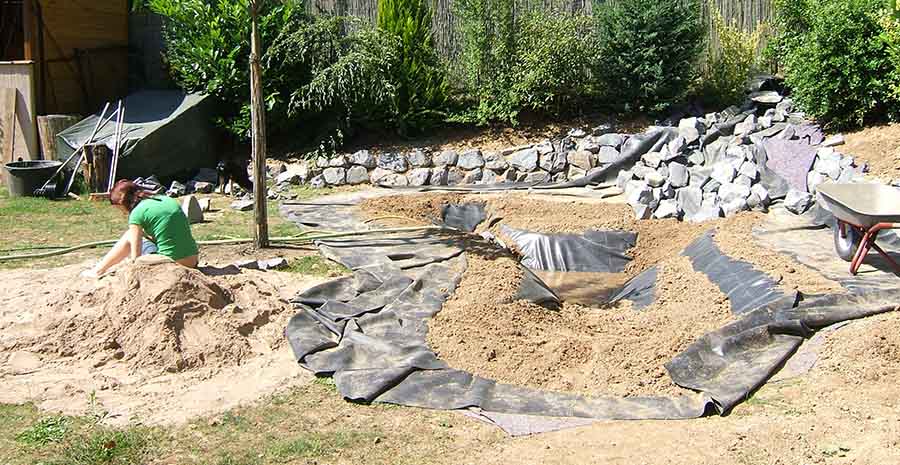
Liner ponds on a slope can use a few different edging methods. To work with a liner pond on a slope, please follow the directions below.
- First, excavate the area that you want to use for your pond.
- Next, you’ll need to think about the edging method you plan to utilize.
- If you want to make a simple or a wildlife pool edge, then you’ll need to place a stake into the middle of the excavated area. The stake you use should be 6 inches deeper than the pond so that it won’t move when you place the soil inside of the pond. Make sure to drive the stake in until you have the top at the desired level of the pool.
- Next, position a piece of straight wood across the pond, going from the stake to the side of the pond.
- Now put a spirit level right over the straight timber.
- After doing that, go around the pond and build up the edge, making sure that the edge is level around the pool.
If you want your edging to be more complex than this, then you’ll need to lay down deeper footings. You’ll need to level those footings and put them in at least 4 to 6 inches deep.
- First, put your stake in the center as I described above, but keep the top at the finished level of the desired footing that you want to achieve.
- After doing that, use your straight timber and put it from the central stake to where you want the footing to sit on the side of the pond.
- Now take a peg that is about 12 inches long and place it down into the soil.
- Next, put the timber you are using as a bridge across and check to see if the level is even.
- If the level isn’t even, keep knocking the peg in until the straight timber looks level.
- It would be best if you continued to do this around the pond and put pegs in every 20” to 40” apart.
- When you are done, make sure all of the pegs are into the soil at least 4 to 6 inches down. You may need to place or remove soil around the pegs.
- After your pegs are all ready, you can lay the footings around the top part of the peg.
- By doing that, you should be able to level your pond on a slope.
Keep in mind that when you level a pond on a slope, you don’t want to use any heavy edging materials around or near the pond for at least one full week. It would be best if you gave the pond some time to settle.
Pond Edging and Leveling on a Slope
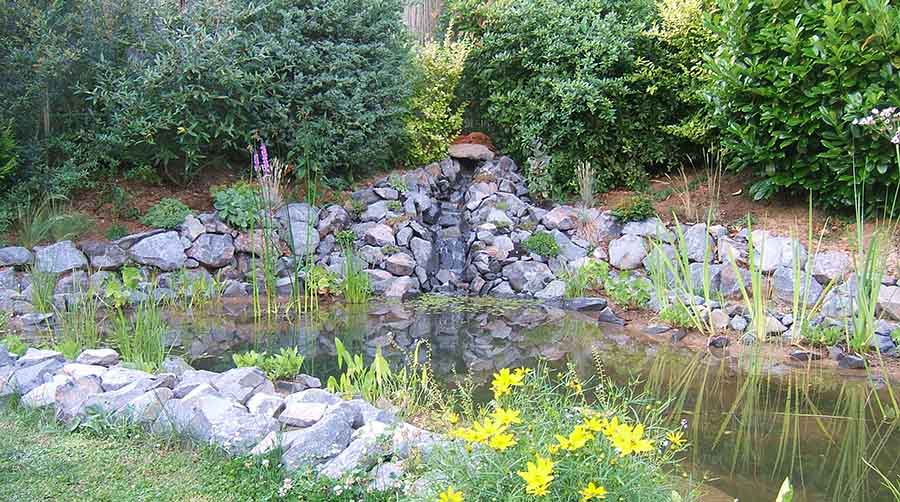
It takes a lot of planning to create a level pond on a slope. If you don’t edge the pond correctly, for example, you can wind up ruining the overall look and feel of the pond. Ponds that don’t have their edging completed properly can look ugly and even have liners that are exposed directly to the sun, which is something to avoid.
If your liner gets exposed to sunlight, it can perish and rot. That means the life span of the pond and the liners will be decreased, and your pond will become prone to damage more easily. So, ensuring that your pond is edged correctly and leveled when on a slope means your pond will last much longer, and you’ll get to enjoy your pond for many years.
Things to Consider Before Building a Garden Pond
When it comes to building a garden pond, you’ll need first to consider the position of the pond. By placing the pond in the right area, you’ll get more out of your pond, especially in a garden. An effective garden pond can allow plants to flower and grow more easily, and also keep out green water and algae.
It would be best if you considered building a pond in a place where there is plenty of sunshine for at least eight hours each day. If you are planning on growing plants that enjoy the water, like water lilies, you will still need to make sure your flowers are getting plenty of sunlight as well as water. You also don’t want to put your pond too close to deciduous trees because the leaves will fall into the pond easily. When leaves fall into the pond, they add organic matter which decays and makes algae, turning the pond green.
If you want to include a water feature with your pond, like a waterfall, then you will need a pump, and that requires a power source. The power source would need to be located close enough to the pond. Since that means you’d be working with water near electricity, it would be better to hire a qualified electrician to work on this process. Keep in mind that waterfalls must also be raised, so you’ll need to include a higher point in your overall pond design.
Remember that the summer heat can make pond water easily evaporate. So, you may need to top the pond off from time to time. That means you’ll need to form your pond within reach of a hose to make refilling your pond more easily. You should also ensure that the site of the pond area doesn’t have anything like
- Drains
- Pipes
- Cables
You don’t want to dig into these things accidentally, or it can create many problems for you later. Make sure you excavate your pond’s hole in an area that is far away from any of these things so that you don’t harm your house or your pond in the long run.
When looking for the area you want to construct your pond, try to find an area that’s flat. However, if you have to use a slope, then you’ll need to level out your slopped area. Your level may look different on the slope. However, as long as you build up one end so that the pond levels out evenly, then you can hide away that built-up area from onlookers. One idea some people use is a waterfall decorated with bricks, which covers up the issue.
Even if the pond itself is not level and is built on a slope, keep in mind that the water level will need to be even, or your pond may wind up draining, leaking, or spilling. If your pond isn’t level and even all the way around and is built on a slope, then you’ll still need to even things out. Besides these considerations, wherever you want to place a pond in your yard is up to you. Most people like their ponds near a patio and seating area so they can watch their ponds while relaxing.
Before Digging: Consider Maintenance
Before you dig anything up and create your hole, you’ll need to think about maintenance. Including a garden pond or regular pond in your yard means you’ll need to pay attention to the pond now and then. You may need to climb into the pond now and then to access plants in the middle of the pond if you cannot get to them from the edge of the pond, for example.
If you need to get into the pond at any point, it’s best to wear waders, especially if you have a deep pond. If you put on waders, then the water should be close to the top part of your waders. Remember that when you bend down to pick up a plant, you may wind up with water seeping into your waders, so pay close attention to that possibility. You can also get to the center of the pond more easily by building a jetty if you’d like.
The Size and Depth of a Pond
Before you excavate your area and dig out your pond, you’ll need to assess how deep you’ll want your pond to be. What you want to do with your pond should help you determine how deep to make it. The minimum depth for a small pond should be about 25 inches. That depth of a pond should be far enough down so you can have some nonornamental fish in your pond and some pond plants.
Certain kinds of water lilies, like the common white water lily, require a planting depth of between 12 to 35 inches. However, most plants are fine with a pond that is about 25” deep. Some other types of plants function as marginals, meaning they need a shallow area of the pond to live.
So, if you are planning on installing any plants that are marginals or any other type of plant that requires a particular depth to survive, you should consider the types of plants you want to grow in your pond before you dig out your pond. So, consider doing some planning, so you know all of the details about the types of plants you want to grow, and the depths they need to survive.
Remember that different plant types that grow in ponds also require different environmental conditions to survive. So, think about how deep you’ll need to plant your plants, and how much it might spread in the pond. Your pond’s size will have everything to do with
- How much space you have available to create the pond
- Your personal preference
- The types of plants you want to grow.
Once you make your decisions about creating your pond, you should mark the pond out with a garden hose. Or, you can use
- A plastic bottle
- String
- Spray paint
Those items can help you develop a visual plan that lets you know the pond’s overall position in your yard.
If you want to build your pond so that you attract wildlife to your yard, then you’ll want to make sure you put shallow areas into your pond. Shallow areas will allow wildlife to access the pond. If you have a sloping beach for the wildlife to access your pond, then use that as you develop the pond. A sloping beach makes it easier for wildlife to get into your pond and explore.
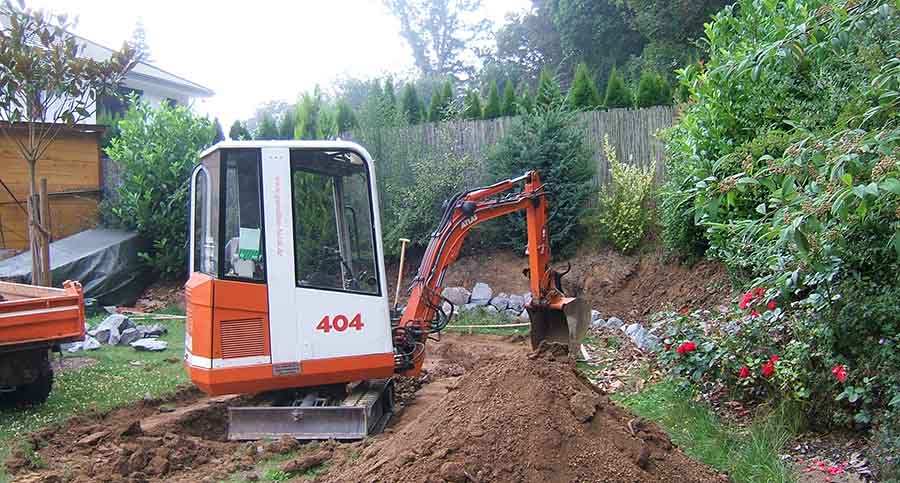
Digging Out and Shaping a Pond on a Slope
Once you’ve finished marking out the space for your pond, you’ll need to focus on digging out and excavating the pond next. Depending on how large of a pond you want, you may or may not need some help. If it’s a large pond, you may want to consider hiring a digger for help. However, if it’s a smaller pond, most people find that it’s easy to dig the pond out alone.
If you do hire a digger to help you out and shift the soil, keep in mind that you’ll still need to finish and shape the pond by hand. If you are digging out and shaping a pond on a slope, you need to make sure that all the shelves on the pond are level. You can double-check that by using wooden pegs or stakes around the pond and using a flat piece of wood to check the level, as we discussed above.
If you are dealing with a pond on a slope, or even if your pond isn’t on a slope, you still need to make sure that the pond is level. You also need to check to make sure that the planting pockets are flat. Take out any nearby stones as well because they can harm the lining of the pond.
The type of ground you are digging into around the pond can also create problems, especially if you decide to make your pond in a stony or wet area. If you are planning on doing that, you’ll need to remove all of the
- Pebbles
- Stones
- Sharp edges
That’s because pond liner is an expensive item, and if it gets punctured, it will leak. That’s not what you want since it’s a headache to replace as well as being costly. Water weight will push down on those stones if you leave them there, and they, in turn, can puncture the liner. So, you want to carefully prep your pond at this point. If there is too much rocky ground, you can always cement the pond.
After you dig out your hole, you’ll need to line it with sand and use even more sand if the ground is hard. You’ll want to use the sand to protect the liner. Once you’ve done that, you’ll need to edge and level your pond as described above, and you’re ready to go.
Final Thoughts
While it can be challenging to level a pond on a slope, it’s still a rewarding accomplishment. Once you’ve leveled your pond, you’ll be able to enjoy plenty of relaxing tranquility. A successful pond creation can create a lot of enjoyment for you and your family.
Helpful Ressources
A great video that I found was the one from Lowe’s below on how to build a garden pond.