
If you’re new to gardening, one of the tools you’ll need to get acquainted with is the pruning saw. They are important for keeping tree branches short. Unfortunately, they tend to go blunt with prolonged use. In this scenario, cutting the tree branches can become a herculean task, if not impossible. Sharpening is the solution to this problem.
To sharpen a pruning saw, you’ll need to separate the blade part from the handle where possible, clean it properly, and then carefully file the groove between two teeth progressively. Once all the grooves have been filed, the saw can be cleaned up, ready for use.
The process of sharpening a pruning saw can, however, be dangerous. The rest of the article will cover everything you need to know about safely sharpening a pruning saw, ensuring it is properly maintained, and more.
What is a Pruning Saw?
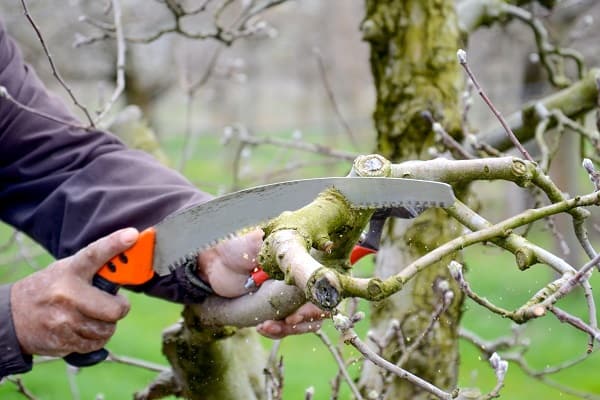
A pruning saw looks like the conventional saw you see every day, but they are designed for use in gardening. A pruning saw comes with a medium length straight or curved blade which is joined to a secure handle. The handle can be straight, but some designs are curved to simplify cutting of curved thick branches.
The blades on pruning saws are sharp and powerful enough to make cutting through large branches super easy. You can also one of these to cut thick bushes.
What are the Different Types of Pruning Saws?
When shopping for pruning saws, you’ll come across a few types, each of them specifically designed for cutting certain types of branches and stems. They include the following:
Pole Pruners
This type of pruning saw is used to reach branches that are beyond your reach. It’s made of a pruning blade attached to a long pole that you’ll hold when gardening. A squeeze mechanism is built into most of these, which controls the jaw end of the pruner. Once pressed, the saw will cut off branches.
The jaw looks smaller and different from what you’d see on a conventional saw, but it does the job. The Happy Buy brand (link to Amazon) is a good option to consider when getting one of these. Some pole pruners come with rotating heads, further making it easier to reach branches in difficult to reach angles.
Handheld Pruning Saws
These are the common pruning saws you’ll find in homes and is the type you’ll most likely need unless you have lots of tall shrubs and trees in your garden that you can’t reach while standing on the ground. The blades on these can be curved or straight.
The ones with straight blades are generally used for cutting green wood or sap while the curved blades are used to cut tough branches that aren’t too big.
Some of the popular hand held pruning saw brands you should consider include Tarvol Heavy Duty and Corona Razor (both links to Amazon).
Commercial Pruning Saws
These are basically the big-sized version of the saws we’ve looked at above. You won’t need these for your home gardening, but they are useful for cutting large and heavy tree branches that are too big for a typical pruning saw, but not big enough to warrant getting a chainsaw.
The Right Way to Sharpen a Pruning Saw
As you use your pruning saw regularly, it will become dull with time. At this stage, it will take longer to complete your gardening, and you’ll find yourself expending more energy to accomplish the same tasks. You’ll also leave more uneven cuts on tree limbs, making it more difficult for them to heal.
Sharpening the blades, therefore, doesn’t just make the pruning task easier; it is also a great way to ensure your plants are pruned very neatly. The entire process of sharpening the saw can be completed in less than half an hour. Here’s how you can do it.
Clean the Debris on the Saw Blade
As is the case with most gardening tools, you have to clean your pruning saw from time to time. This is especially important when you are about to sharpen it as it is the best way to get rid of any dirt or debris lodgment that can interfere with the process.
To do this, you need to get some water, a brush and a cleaning agent. You’ll also have to wear gloves to protect your hands from the teeth of the saw, or any wood chips poking into your fingers. Mix some of the cleaning agent in water, and use the solution to wash the blade. Use the brush to scrub across the teeth of the saw to ensure you reach all stubborn dirt and stains.
Don’t apply too much force while brushing the blade. Although your fingers are covered with a glove, you still want to make sure you are not exposing yourself to cuts and bruises. Once you’ve brushed down the blade properly, dip it in water to get rid of the resulting dirt.
If you find caked residue on the blade, leave it in water for 5-10 minutes to soften up, and then try brushing it off again. You can also use some kerosene to get rid of stubborn sap residue. Dip a small rag in some kerosene and gently rub it across the spot. The sap will gradually thin out as you rub it and will disappear after a few minutes.
Wash off the kerosene once you are done and rinse the blade thoroughly.
Take the Blade Out Of the Frame
If you have a pruning saw designed to allow you to take the blade out, carefully separate the blade from the rest of the handle. Read the manual for directions. If you have a pruning saw that doesn’t allow removal of the blade, don’t worry. You can still sharpen the blade while it’s in place.
Put the blade (or the entire saw if you can’t pull out the blade), into a table vise with the serrated side of the saw pointing upwards. If you don’t have a table vise, you should add one to your toolkit. The Yost LV-4 (link to Amazon) is an affordable option you should consider.
Start Sharpening the Saw
To sharpen the saw, place a sharpening rod in the space between two teeth. Once fitted, push the rod forward to file off the metal. This will sharpen the blade. With each space, you should repeat the filing process 5-7 times, or until you see a burr of curled metal fillings on the other side of the blade.
To avoid damaging the blade, you should never move the filing rod back and forth as you would when sawing off wood. Instead, insert the rod, push it forward to file, remove it, and then put it back again to repeat the filing on the spot you’re working. Some people disregard this tip, as you’ll find in this video, but there’s always the danger of spoiling the teeth of your saw.
Move progressively from one “teeth hole” to the other, until you have covered all the serrations on the saw.
You can also use a small rolling sander to sharpen your pruning saw as shown in this video, especially if you already have one of those. If you don’t have one, it will be costlier to get one compared to just using a filing rod.
Additionally, you need a lot more caution to avoid injury while working with this tool. As you’d see in the video, you need a high level of precision to accurately work the teeth on a pruning saw with it.
Clean the Burrs
The burrs are the metal remnants that form as you sharpen your saw. You’ll find a lot of it on the backside of the blade when you’ve completed the sharpening process. To clear them, rub the filing rod or flat file across the surface.
It’ll only take two or three rubs to get rid of the burrs.
Lubricate the Metal
The blade on your pruning saw has to be coated with lubricants once you’re done sharpening it. This is to protect it against rust. Any oils will do the job, including vegetable or engine oils.
Pour some oil in a clear container, dip a clean piece of cloth into the oil and wipe down the saw blade. Take care to cover as much of the crevices as possible. Once you’re done, allow the oil to settle on the blade overnight.
If you have to use the blade immediately, you can skip the lubrication process until after you are done with your gardening.
If you get the sharpening process right, you’ll find your pruning saw working more effectively. You’ll also immediately see that you don’t need to apply as much force with your pruning compared to when the blade was blunt.
A Few Things to Keep in Mind
- Don’t forget to wear protective gear when sharpening a pruning saw. Hand-gloves are very important, but you may also need to wear eye protection to avoid getting some burr or metal dust in your eyes on a windy day.
- You’ll need to get a sharpening rod that fits into the spaces between the serration on your saw blade. If you use one that’s too big, you risk filing away some of the teeth on the saw or getting them too thin. A sharpening rod that’s too small, on the other hand, won’t make enough contact with the blade to properly file it.
- Remember, you don’t need to remove the blade on your pruning saw to sharpen it. If the design and mechanism doesn’t support blade removal, use a table vise.
- A table vise is highly recommended because it helps keep the blade or saw in position, ensuring you can focus on sharpening. If you are juggling between filing and holding the blade in place, there’s a higher risk of injury or damage to the pruning saw.
How to Safely Use a Pruning Saw
Once you’ve sharpened your pruning saw, it is time to go back to your gardening. To ensure safety while using the saw, here’s what you should do.
Don’t Test Sharpness with Your Fingers
After you’re done working on your pruning saw, there is always the temptation to test the sharpness with a finger. This could lead to a cut. You should instead use a branch to test the effectiveness of the work you’ve done.
Work in Comfort
You should ensure you are standing firmly and maintaining a slightly wide stance. Go with long pull strokes and pull with a slight lean of the body for major cuts. At the very least, you should use your whole arm instead of resting all the weight on your wrist and elbow. Working in a comfortable stance allows you to conserve strength and helps reduce the risk of mistakes.
Use Safety Equipment

You should wear the right safety equipment for the pruning saw you are using at any moment. While hand gloves and boots can be enough protection for a handheld pruning saw, you’ll need a helmet to safely work with a pole pruning saw. There’s the risk of the saw falling from your hand and hitting you, as well as the possibility of a sawed-off branch falling directly on you.
Maintain the Straightness of the Blade
If your pruning saw blade flexes while using it, you are either applying excess pressure when pushing or you are not pulling the saw straight. This can lead to the breaking of the saw, and in worst-case scenarios, injury for your hand. Take things easy, and ensure you are only applying pressure on pulls.
Don’t Drop Your Saw
Your boot will protect you from an accidental cut when you step on the dropped saw, but you can still break it. It’s annoying to have to quit gardening halfway because you broke your pruning saw—even more so if you have to end up spending money on a completely new one.
To avoid this, get a holster for your saw and wear it on your belt. Tarvol (link to Amazon) includes one of such holsters in their pruning saw package.
How to Keep Your Pruning Saw from Going Blunt Frequently
When you’re done sharpening your pruning saw, you need to take better care of it to reduce the frequency of blunting. Here are some of the things you should do.
Use the Right Pruning Saw Size
As you’ve seen above, most pruning saw designs have the domestic or home-use variants and their commercial options. Using a small pruning saw to cut a sizable branch that’s growing too close to your window may sound like a good idea, but it will most likely end with blunting the teeth on the saw. In worst-case scenarios, the saw could break during the process. Always use the right saw size for the job.
Clean the Saw and Keep it Dry
When you are done using your pruning saw in the garden, tap it on a surface to get rid of any lodged wood chip. Clean off any plant sap as well. You can use a sturdy cloth or clean burlap for this process. If you store it dirty, corrosion will set in, and the saw will lose its edge.
Similarly, storing the saw in a place where it can get wet will also lead to rust. Dropping it on the floor of your garage isn’t a great idea either as moisture from the ground can corrode the blades. Put it in a box, or at least get it off the ground.
Don’t Let the Blade Touch Sand Too Frequently
If you are pruning shrubs or trees that are near the ground, you should watch closely to keep the blade from getting into the soil. The blade will become blunt with frequent contact with pebbles and sand.
Use Lubricant on the Blade After Working
Once you are done using your pruning saw, lubricate the blade with paste wax, gun oil or any such lubricants. You can apply these with a rag and let the lubricant sit for 5-10 minutes before you wipe it off the blade. This will prevent rust and will ensure the blade slides through wood better.
Scrape Off Blade Rust
If you find rust on any part of the blade after your best care, you should scrape it off to limit the spread. A razor blade can do the job at this point. Just lay the saw blade on a flat surface and scrape the rusted surface carefully. You’ll have to keep the razor at a low angle to get the job done.
If there are stubborn spots, scrub it with any 320-grit sandpaper. Once done, wipe down the blade with a soft dry cloth and apply lubricant immediately.
Final Words
A pruning saw is one of the most important tools in the arsenal of any gardener. By learning how to sharpen it when it goes blunt, you can stay efficient and also get maximum value from the saw. The process can be tricky for first-timers, but it only takes the first experience to learn how to do it.
Don’t forget to stay safe throughout the process. Protect your hands and fingers from the blade’s teeth using gloves and use goggles if you are working outside on a windy day.