
If you are the proud owner of a yard or garden, you likely understand that one of the most important factors in maintaining it is installing a proper watering system. Two of the most common landscaping watering systems are sprinkler systems and drip irrigation systems, and it is important to understand which system is the best choice for your landscaping needs.
To choose between a drip irrigation system or a sprinkler system, you must consider the following factors about your yard or garden:
- The size and terrain of the land
- The types of plant life that need to be watered
- How much time and effort you want to put into installation vs maintenance
- Typical setbacks you might have to deal with
- How eco-friendly you want your watering system to be
Installing a watering system can be costly and time-consuming so it is important to understand your unique landscaping needs and the pros and cons of both watering systems. Here I have compiled a helpful and comprehensive guide to help you choose the right system for your yard.
How to Choose Between a Drip Irrigation System and a Sprinkler System
Before we delve into the different factors in choosing the right watering system, it is important to understand what exactly each system is.
A drip irrigation system, also known as micro-irrigation or trickle irrigation, is a system that consists of a series of the following:
- Long pipes or tubes
- Valves
- Emitters
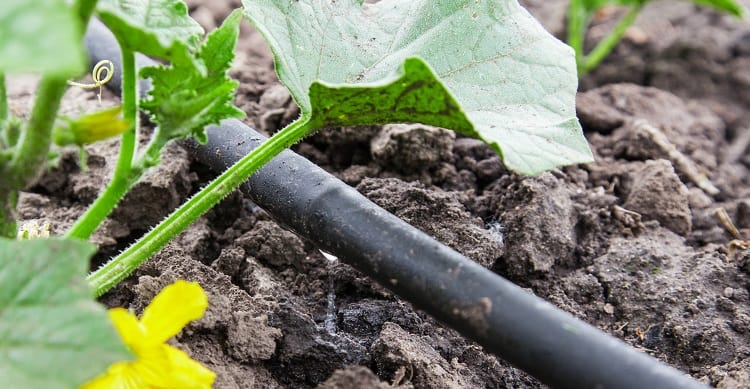
The pipes or tubes usually run very low to the ground and have openings at different intervals, where they dispense water in a slow, controlled manner directly onto the soil.
A sprinkler system, also known as an overhead spray system, consists of a network of pipes installed underground with only the sprinkler heads exposed above the ground. Pressurized water is pumped out from the spray heads and state-of-the-art head nozzles will break up the water into uniform drops that are distributed in a wide, structured spray pattern.
Now, that you know the difference between both landscaping watering systems, you can now analyze the following factors to help you decide between the two of them:
Consider the Size and Terrain of The Land You Want To Water
Pros and Cons of a Sprinkler System

Sprinkler systems are incredibly effective at watering large, level areas that need a substantial amount of water, like:
- Lawns
- Commercial properties
- Athletic sports complexes
Most sprinkler systems are hooked through municipal water supply and disperse large volumes of water consistently which is great for wide expanses of grass that need a lot of water.
Sprinkler systems are less suitable for landscapes that:
- Are irregularly formed
- Are sloped
- Have plants scattered unevenly across the landscape
Using a sprinkler system with these types of terrains can run the risk of underwatering or overwatering parts of your landscape. Plants that are closest to the sprinkler may get too much water while those that are farther out won’t get enough.
Pros and Cons of a Drip Irrigation System
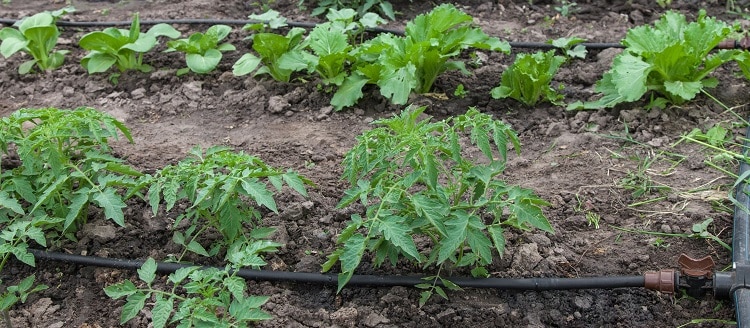
A drip irrigation system works best if you want to keep the water targeted on specific plants. This is fantastic if you have a small garden. Your terrain also doesn’t have to be level or even throughout to use a drip system – you can adjust the piping and openings to precisely fit the landscape.
Drip irrigation systems are far less suitable for large expanses of terrain, as proper irrigation requires exceedingly long sections of drip line which can get expensive.
Consider the Types of Plants That Need to Be Watered
Pros and Cons of a Sprinkler System
If you are watering a grassy lawn with little to no plants, then the sprinkler system will likely work the best for you. Grass typically needs to be watered until the top 6 to 8 inches of soil are wet – which is a large amount of water if you have a big enough lawn! This is why you need the strong consistent spray of sprinklers to properly wet your lawn.
The amount of water that grass needs per week is essentially the amount it would get normally from rainwater. This is why sprinkler systems work so well with lawns because the consistent spray within a select interval imitates rain.
However, sprinkler systems are less effective if you are trying to grow plants that root deeply in the soil – like many vegetables. The spray is so spread out that it takes a lot of time for the water to seep down to plants that have very deep roots.
Pros and Cons of a Drip Irrigation System
Drip irrigation is a great option if you want to concentrate water on specific plants within a specific area. Since water is delivered slowly and directly to the soil, it seeps more deeply to the roots of your plants and promotes healthy growing roots.
Drip irrigation systems also do not overwater flower and vegetable leaves, which could lead to fungal diseases growing and destroying your plants.
However, it would take a long time for drip irrigation to water large lawns or commercial areas in as efficient of a time frame as a sprinkler system.
Gauge How Much Money and Effort You Want to Put Into Installation or Maintenance
Installation and Maintenance of a Sprinkler System
Sprinkler systems can be quite expensive – averaging about $1,700 – $3,400. The more advanced, state-of-the-art sprinkler systems with controllers and sensors that regulate the timing and activation of the system will run up higher costs.
It is also highly recommended that you hire contractors to set up your system. While it is possible to DIY a sprinkler system and save on the cost of labor, the work requires a lot of expertise and it can be easy to destroy your lawn in the process. An irrigation installer can charge anywhere from $40 to $100 an hour.
Many other factors could hike up the cost of your contractor’s cost of installation:
- If you have a complex lawn with multiple zones that need to be watered, your contractor may need to design a custom layout of sprinklers so that the patterns overlap and no areas are missed.
- You may need to acquire a permit to install a sprinkler system
- You may need to rent digging equipment to dig the trenches for your sprinklers
However, once your system is properly installed, there is generally little maintenance that needs to be done post-installation. If your sprinklers have a timer, you can literally set it and forget it, leaving the automated system to do its work.
Installation and Maintenance of a Drip Irrigation System
If the landscape that you are watering is small, installing a drip system will generally be low-cost. According to the USDA Natural Resources Conservation Service, a typical drip irrigation system will run from about $1,800 to $2,500 per acre which is significantly cheaper than a sprinkler system.
It is generally a lot easier to DIY a drip irrigation system than a sprinkler system. However, drip irrigation systems can also be a fair amount of work to set up. The initial planning is crucial to setting up a drip system as you will need to map out precisely where your water needs to drip onto your plants, buy all the correct materials and build your complex network of pipes or tubes.
Drip irrigation systems also require more upkeep than a sprinkler system. Because the entire system is above ground, it requires consistent cleaning to work properly.
General drip irrigation system maintenance includes:
- Cleaning the filter once a month (even more if the water supply you are using has a lot of sediment)
- Inspecting all the drippers to make sure they are working properly
- If your area has a winter season, you will have to completely drain your system, uninstall it and store it away for the winter. Then when the spring comes, you will have to set it up completely again.
Weigh the Setbacks You Might Encounter
Setbacks of a Sprinkler System
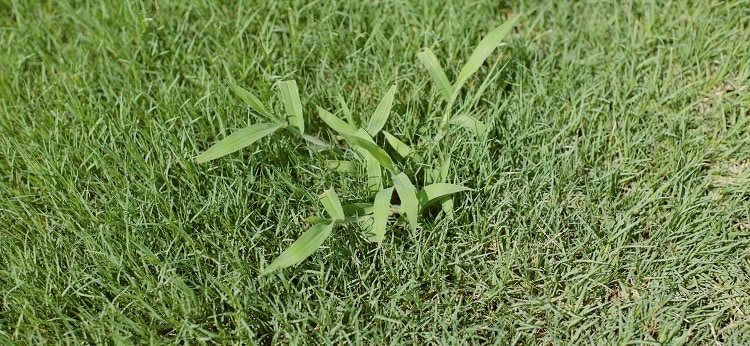
Weed growth is far more common with a sprinkler system than it is a drip irrigation system. Sprinklers are indiscriminate – meaning they will water every surface or plant that is within its radius. That includes weed seeds. There is a much higher chance of the sprinkler water activating weed seeds and weeds sprouting up over your lawn.
If you have other plants growing in your yard or garden, the consistent spray of water will likely water all the leaves of your plants as well. This is normally not beneficial as most garden diseases and fungi thrive on moist plant foliage. You may find yourself purchasing fungicide to combat this problem or having to watch your plants die.
Sprinkler systems can also cause damage outside of your yard if you are not careful about its placement. Sprinklers that are too close to your house could cause water damage to outside areas like
- Walls
- Molding
- Piping.
Setbacks of a Drip Irrigation System
Since drip irrigation systems are above ground and exposed to the elements, there is a much greater risk of clogs or damage happening in your system. The following issues could arise with your drip irrigation system:
- The openings can often get clogged by debris, mineral build-ups, or algae.
- Even if you install filters to combat poor quality water, those can get clogged as well.
- Strong UV rays can damage tubing if they are not UV rated.
- Rodents or animals can chew on your tubing.
- If you use shovels or lawn mowers on your landscaping property, you could damage your drip irrigation system if you aren’t careful.
Decide How Eco-friendly You Want To Be
Without a doubt, drip irrigation systems are far more eco-friendly than sprinkler systems. There are multiple reasons why this is so:
Drip irrigation conserves a lot more water than sprinkler systems
Sprinkler systems can waste a ton of water. Since the water is sprayed out as small droplets over a large surface area, there is a much higher chance of evaporation. This chance is increased during hot weather or windy weather.
Since drip irrigation applies water slowly and directly onto the exact soil location that you want, there is a much greater chance of it soaking into the soil and watering the plant properly. This means that almost all of the water dispersed will actually be utilized by the plants.
Sprinkler systems are more likely to cause soil erosion than drip irrigation
Soil erosion occurs when the topsoil in your landscaping is worn away over time by
- Wind
- Water
- Foot traffic
This can be detrimental to your yard or garden because the topsoil contains a large amount of nutrients that your plants need to thrive.
Due to the constant spray of water, sprinkler systems can erode away the soil, leeching away the nutrient-dense topsoil and hindering the growth of your yard.
How to Install Your Landscaping Water System
Now that you’ve weighed the pros and cons of both systems and decided on the best one for your landscaping needs, it’s time to learn how to best install either system.
How To Install a Sprinkler System
Although you will likely contractors to set it up for you, there is still a lot of planning and strategy involved in installing a sprinkler system:
- Pinpointing where your plumbing is. Before you map out any part of your in-ground sprinkler system, you first have to understand where your plumbing pipes are located so it does not interfere. The worst thing would be to hit a pipe while installing and suddenly all of your toilets don’t work. You may want to hire a land surveyor to locate your pipes.
- Determine if you need a permit. The majority of cities and municipalities require you to obtain a permit if you are installing a sprinkler system because you are likely connecting it to a local water supply.
- Make a map of your yard. This will speed up the process of your contractors understanding your landscaping needs. Be sure to include:
- The size of your yard
- The location of your house
- Key features such as pipes, trees, shrubs, and plants
- If there are slopes, where they are located
- Decide what kind of sprinkler heads you want. Nowadays there are many different sprinkler heads available for different watering needs so it’s important to choose the right ones. You can choose amongst the following options:
- More traditional sprinkler heads for lawns
- Bubblers for gardens
- High-rise sprayers for large landscaped areas
- Determine where you want sensors and shut off valves to be placed. Depending upon what areas you don’t want to overwater or underwater, you should plan where you would like automatic sensors and water shutoff valves to be located.
- Make plans for lawn repair afterward. After you’ve installed your underground watering system, you may have to repair your lawn afterward. This means either paying money to buy new sod for the lawn or paying an expert to re-landscape your lawn.
Here’s a helpful video from MrFixIt DIY where you can see how the system is being installed:
How to Install a Drip Irrigation System
Although it is possible to hire contractors to install a drip irrigation system, most people install their own system, especially if it is for a small garden. Here’s how you can DIY a drip irrigation system for your landscape:
- Create a map of your garden or yard. Similarly to a sprinkler system, it is important to sketch out the layout of your garden so you know exactly where to lay your drip irrigation pipes or tubes. Measure out your garden and determine all the different root and plant zones.
- Determine the best watering device and flow rate for each plant zone. Based on the needs of your soil and plants, determine the different watering devices you will need to supply each area with the right amount of water. Different devices have different flow rates – or ranges of watering speed – that they can supply to your plants:
- Drippers – great for individual plants or container plants
- Bubblers – disperse more water than drippers so great for larger plants like roses, tomatoes or bushes
- Sprayers – like a miniature sprinkler without moving parts and can be used to water ground cover or densely planted flower beds
- Emitter drip lines – a drip line that consists of tubing with built-in drippers spaced at different locations for different plants, great for rows of vegetables or plants, or for winding around shrubs or large plants
- Purchase the proper supplies. Depending on if you want your irrigation system to consist of mostly PVC pipes or tubing, there will be some variance in supplies but for the most part, these are the basic components of a drip system:
- Faucet connector which connects your main tubing or piping to a water supply like an outdoor hose faucet
- Filter to prevent debris from entering your drip system
- Pressure regulator to reduce water pressure in your system so that it drips slowly rather than shooting out
- Backflow preventer to prevent water from flowing back to the water source once the system is shut off
- Main supply tubing or PVC pipe that brings water to your valves and emitter drip lines. Make sure to measure this out carefully based on the size of your yard.
- Emitter drip lines or tubing that bring water from your main supply line directly to the plants
- Emitters which are where the water drips from
- Connectors like T-connectors or 90-degree connectors that will help your tubing or pipes bend
- End caps which also help to reduce water pressure and prevent excess water from flowing out
- Battery-operated timer to automate your irrigation system. This is optional but makes life a lot easier overall.
- Extra tools for designing your system – If you are using tubing, you may need pruning shears to cut tubes and a strong hole punch to create holes. If you are using PVC pipes, you may need a hacksaw to cut pipes and a drill to create holes.
Many home and garden retailers actually sell drip irrigation kits that provide a good amount of the supplies listed above. A typical kit can run from $30 to $300.
Here on Amazon you can get a kit for less than $30 which has many positive reviews and can water up to 20 plants at a time.
However, the types of supplies included can vary and your particular garden may need a larger supply of emitters or end caps than a kit offers. That’s why it’s very important to map out your garden and understand its watering needs before setting out to purchase supplies.
- Build out your system. Once you’ve planned out your layout and acquired all the right supplies, you may begin connecting and laying out your drip irrigation system:
- Connect your backflow preventer, timer, pressure regulator, filter, and/or tubing adaptor to your faucet. You may choose to omit some of these but the most important component is the tubing adaptor.
- Design the tubing or pipes to your garden or yard according to your plan. Tubing will be easier to work with if you soak it in warm water or let it sit in the sun to soften.
- Edit as you go. As you lay out your system, cut tubing with your shears or cut pipes using your hacksaw.
- Connect different sections of tubes or pipes using your connectors. You also have the option to vary your system with BOTH pipes and tubes but remember to make sure you have the proper connectors.
- Connect the emitters. Now you can add the various types of emitters depending upon your particular plants – drippers, sprayers, bubblers, or drip lines. For tubing, you can use the hole punch to punch an opening for the watering device you want to connect.
- Flush out the system. Once you’ve completed building out your system, flush it out once with water to get any debris out.
- Cap it off. Place end caps at the open ends of your main PVC piping or tubing, ensuring that water only flows out through your emitters.
- Test it out! Turn on your irrigation system and let the water run out for an hour. After an hour, inspect the various plant areas and see how the soil and root zones have been watered properly.
- Adjust. The good thing about a drip irrigation system is that it is easier to take apart and re-adjust if certain areas need to be altered.
Here is a great video from Fine Gardening that shows you step by step how a drip irrigation system is installed:
Using Both Watering Systems for Your Landscaping
Now that you’ve been thoroughly educated on the installation of both watering systems, you may decide that you want both systems to properly water your yard.
That is absolutely an option! Depending upon your landscaping, you can actually combine both systems to ensure that various areas of your lawn get adequate amounts of water.
Let’s say that you have a large lawn but you also have a border of shrubs, a flower garden, and a small vegetable garden.
For the lawn area, you can have a sprinkler system installed to adequately water the entire expense of your grass, and for the flower beds, shrubs, and vegetable patches you can have a long network of drip irrigation tubes with different emitters that bring water directly to the plants.
Nowadays, there are a lot of new advancements being made in drip irrigation systems so that even more unique landscaping needs of different yard-owners can be satisfied:
- Some contractors can install subsurface drip irrigation systems, which have emitter lines treated with herbicide so that roots don’t grow into the tubing.
- You can buy miniature sprinkler emitters to drip irrigation systems so that they actually spray water. The spray will not be enough to cover a large lawn but can be great for densely populated flowerbeds.
Regardless of which system you choose, it is important to do your research and consult a professional if you are uncertain about any technique.
Recommendations for Supplies
Now that you know exactly the type of system that your yard needs and you’ve mapped out the necessary design, here are some recommendations for supplies that will make your installation process go more smoothly and that are all available on Amazon:
Sprinkler System Supplies
- Sprinklers – Although most people will want to hire a professional to install their in-ground sprinkler system for them, you may feel confident enough in your DIY skills to set up your system yourself. These particular sprinklers have a great rating, can be adjusted to have a 40 degree to 360 degree radius and spray a distance of 19 to 32 feet.
Drip Irrigation Supplies
- Main Line Tubing – This tubing is extremely affordable at less than $11 per 50ft and rated at 4.5 stars out of 1,300+ reviews. It is made of low-density polyethylene and can be left out year-round in all weather.
- Micro-Bubblers – These Axe micro-bubblers are rated 4.5 stars out of 900+ reviews. Each drip head has 8 outlet holes at the top of each emitter that spray water in a full circle pattern, easily watering groups of plants, and has an adjustable cap that controls the flow rate.
- Water Timer – This Orbit timer has over 11,000+ reviews and 4 out of 5 stars. It has a run time of 4 hours, a built-in rain delay which pauses your watering schedule for 24-72 hours, and an easy-to-read LCD screen to make programming easy.
- PVC Cutter – These Dewill shears have 4.5 stars and are versatile and strong enough to cut through most plastic tubing and even pipes. The pipe cutters are made of high-quality manganese steel with Japanese Teflon SK5-42mm blades – incredibly tough and durable.